Ooma Launches A New App to Make Telo Setup Easier
 | February 8, 2018 | 3 min read |
Features of the Ooma Telo Setup App
Using the app, it’s easy to wirelessly access your Ooma Telo.During the setup of your Ooma Telo, the new app provides straightforward and easy-to-follow instructions to guide you through the entire installation process. Note that the setup app connects to the Telo Air via bluetooth. If a customer does not want to use a mobile phone and computer is a more convenient for them – Ooma provides a way to do activation via PC/Mac too.Telo devices that are not Telo Air can use the legacy setup method to activate their device.You can use the app to reconfigure the device at any time. For example, changing the Wi-Fi connection that your Telo uses is an easy switch with the app.The app also provides access to additional help documentation, and Ooma’s Customer Support can be accessed through the app.Additionally, the Telo Status feature provides details about your device and its connection.How the App Works
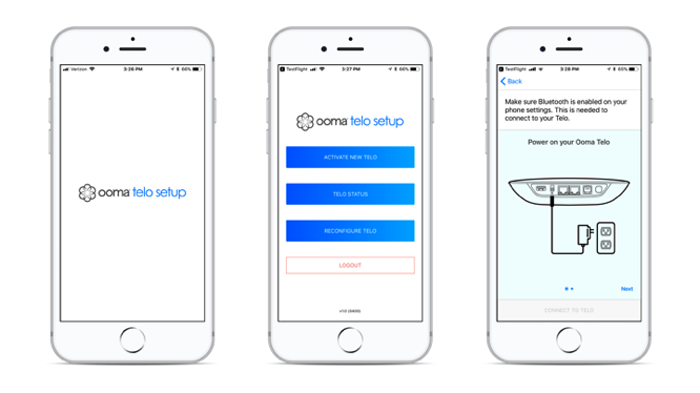
The homescreen of the app has three buttons to choose from. You can activate a new Telo, check your Telo status, or reconfigure your Telo.Let’s break down the steps for activating a new Telo device using the setup app:- To activate a device, the first prompt in the app is to point the camera of your mobile device at the QR code on the bottom of your Ooma Telo. After acknowledging the terms and conditions, you are then prompted to create an Ooma account. You’ll enter in your contact information, set up a password, and enter your service address that will be logged in Ooma’s emergency system for 911 calls. You’ll then enter your credit card information.
- Next you’ll choose your Ooma Phone Number to finish creating your Ooma account. If you would like to use an existing phone number with Ooma, you have the option of porting your phone number after your Ooma account has already been created and activated.
- Then you’ll continue setting up the device by choosing the way that you’d like the Telo to be connected to the Internet — either via Wi-Fi or with an ethernet cable plugged into your router. Follow the instructions to complete this connection, and if you are connecting via Wi-Fi, you will be prompted to enter the Wi-Fi password.
- Lastly, your Telo will complete its internal cycle to properly initialize and configure itself. This initialization process is pre-programmed, and it doesn’t require you to do a thing. It may take 10 to 15 minutes before it’s ready. Simply wait till the Ooma logo on the Telo lights up with a solid blue.
Download the Ooma Telo Setup App
Ooma’s selection of apps include this Ooma Telo Setup App, as well as apps for using Ooma Telo, Ooma Office, and Ooma Home Security.To download the Ooma Telo Setup App, Apple’s App Store if you are using an iOS gadget, and visit the Google Play Store if you are using an Android device. Or search for “Ooma” or “Telo Setup” in your app store, and look for the Ooma logo with the gear on it.


Dennis is the vice president of product management and technical advisory board member of Ooma and is responsible for creating an intuitive, compelling user experience.
Prior to joining Ooma, Dennis worked at Cisco Systems for 11 years where he began his career as a customer support engineer. He later joined the Escalation Team where he focused on fixing the most technically challenging problems, as well as supporting the design, rollout and operations of the largest remote access and broadband aggregation networks worldwide. He was honored with the title of Distinguished Support Engineer because of his expertise in networking protocols, isolating and fixing highly complex issues, and leadership among his peers.
Dennis holds Bachelor of Science and Master of Science degrees in Electrical Engineering from Stanford University.